Using SPDY with Nginx 1.4
Nginx 1.4 finally went stable. This new version comes with SPDY integrated. If both web browser and server support it, SPDY improves your site's performance.
Because SPDY is built on top of SSL, it will encrypt all communication as a side effect. This helps to secure e.g. the admin login area of this blog.
I played with SPDY a bit. Here is how I got it to work on Ubuntu Linux.
1. Get an SSL certificate
Get a valid SSL certificate for your website. This is mandatory, because SPDY is based on SSL. An easy way to do this is to go through your domain hoster.
2. Install OpenSSL
Install OpenSSL >= 1.0.1 and PCRE. On Ubuntu, use:
$ apt-get update
$ apt-get install libssl-dev libpcre3 libpcre3-dev
Check the version number with
$ openssl version

OpenSSL version 1.0.1c works.
3. Compile Nginx 1.4 with SSL and SPDY
To compile Nginx 1.4 with SSL and SPDY support:
$ wget http://nginx.org/download/nginx-1.4.7.tar.gz
$ tar xvzf nginx-1.4.7.tar.gz
$ cd nginx-1.4.7
$ ./configure --with-http_ssl_module \
              --with-http_spdy_module \
        	    --prefix=/usr/local/nginx
$ make
$ make install
This will install Nginx in /usr/local/nginx.
4. Install your Certificate and Private Key
Copy your certificate and private key files to /usr/local/nginx/conf/certificates. I assume here they are named mysite.crt and mysite.key.
Then add SSL and SPDY to your Nginx vhost in nginx.conf. Let's say your vhost looks like this right now:
server {
      listen 80;
      ...
}
Change it like so:
server {
      listen 80;
      # Enable SSL and SPDY
      listen 443 ssl spdy default_server;
      # SSL certificate and private key
      ssl_certificate      certificates/mysite.crt;
      ssl_certificate_key  certificates/mysite.key;
      # Tell the browser we do SPDY
      add_header        Alternate-Protocol  443:npn-spdy/2;
      ...
  }
The add_header directive is important! It tells the browser that your server is SPDY capable. If you run Nginx without it, the browser won't know that your server supports SPDY and will use plain HTTP instead. Either you must redirect the client to port 443, which you probably do not want, or you add response header to inform the browser as I do here.
5. Install the Intermediate Certificate
There are popular CAs such as RapidSSL that are unknown even to modern browsers. To allow the browser to verify your certificate, you may have to add your CA's certificate as an intermediate certificate to your own. In this case:
- Download the intermediate certificate. It is usually provided along with your own.
- Make a backup of your certificate file `mysite.crt`.
-
Concatenate the certificate files:
{% highlight bash %} $ echo "" >> certificates/mysite.crt $ cat RapidSSL-Intermediate-CA.pem >> certificates/mysite.crt {% endhighlight %}
This will append a newline and the intermediate CA's certificate file to yours.
6. Start Nginx.
Start your Nginx server.
7. Check the Site with Chrome
Use the latest version of Google Chrome and go to your site to check that it works.
8. Check that SPDY is Active
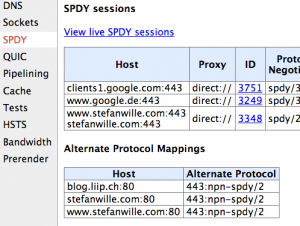
Check that SPDY is active: Go to the URL chrome://net-internals/#spdy in Chrome. The section "Alternate Protocol Mappings" should list your site.
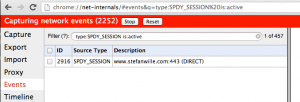
Click "View live SPDY sessions". Again, the table should list your website.
9. Check the Site with Firefox
Test with a recent Firefox version as well, as it behaves differently.

